Example: installing tinc on Windows 2000/XP/7/8
This example shows how to install and configure tinc on Windows 2000, XP, 7 or 8. It is not a HOWTO, it is recommended that you read the manual as well.
Downloading and installing tinc
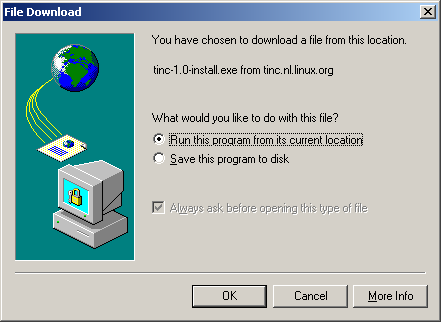
First, download the installer from the website. You don’t have to save it, run it from its current location.
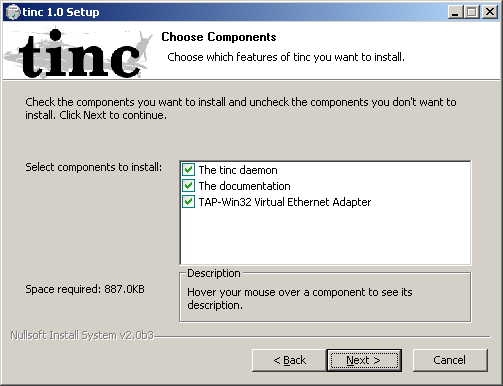
Follow the instructions of the installer. If you already installed a TAP-Win32 or CIPE driver, you can uncheck the TAP-Win32 driver component.
Configuring tinc
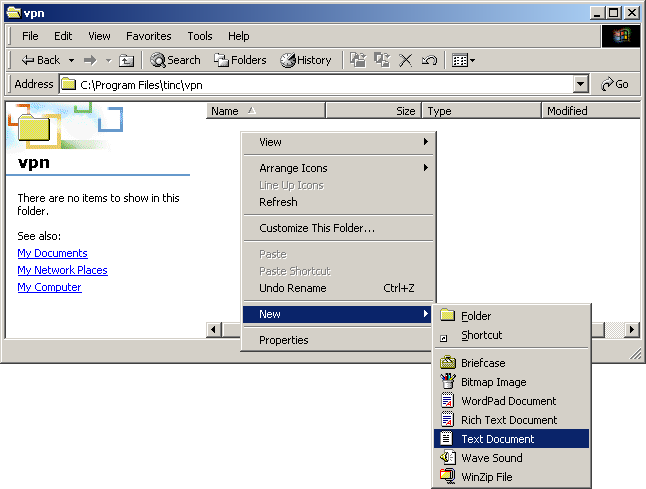
Next, open the explorer and go to the directory where you
installed tinc. This probably is C:\Program
Files\tinc. To start configuring tinc for your VPN, create a
new folder and give it the name of your VPN (if you don’t have a
name for it, use vpn or make one up).

In this folder you will have to create a new file named
tinc.conf.
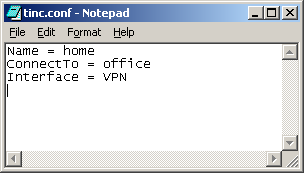
Open this file with notepad or wordpad. In this file you have to
specify the name of your computer on the VPN. This doesn’t have to
be the name you gave to Windows, we assume you’re calling it
home. You can also specify to which other tinc daemons
you want to connect. You should also specify the network interface
that tinc will use. We will create that interface later, we will
assume it is called something like VPN.
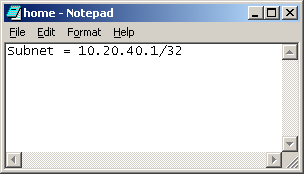
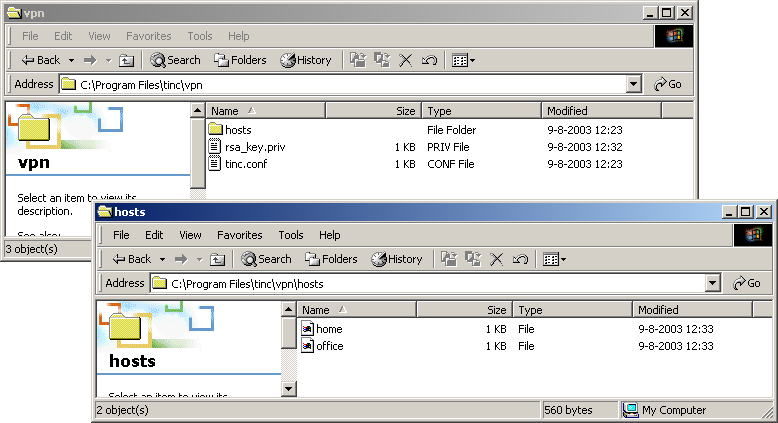
In the current directory, you have to create a directory called
hosts. In this directory the host configuration files
are stored. First you have to create one for your own tinc daemon.
The name of the file must be the same as the Name you specified in
the tinc.conf file: home. This file
should contain a Subnet variable, indicating which IP addresses
your tinc daemon represents on the VPN. This is probably just a
single address, we will assume the subnet is 10.20.40.1/32.
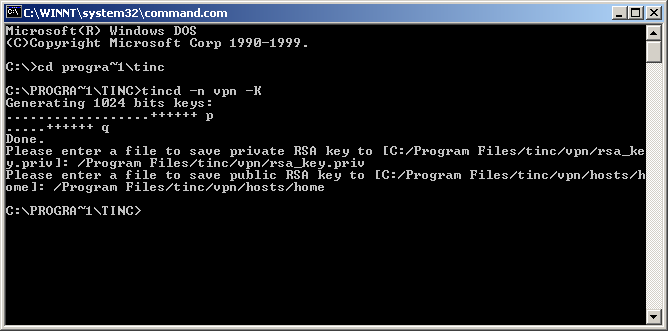
Now you have to generate the public and private key for your
tinc daemon. You do this by starting command.com. Go to the
directory where tinc is installed. Start tinc with the
-n option set to the name of your VPN and use the
-K option: tincd -n vpn -K. The keypair
will be generated, and you are asked to enter the names of the
files to store them. Just press enter twice to use the default
filenames.
Now that the keys are generated, you should give the office a
copy of your hosts\home, and you should get a copy of
hosts\office and store it in your hosts\
directory. The configuration of tinc is finished.
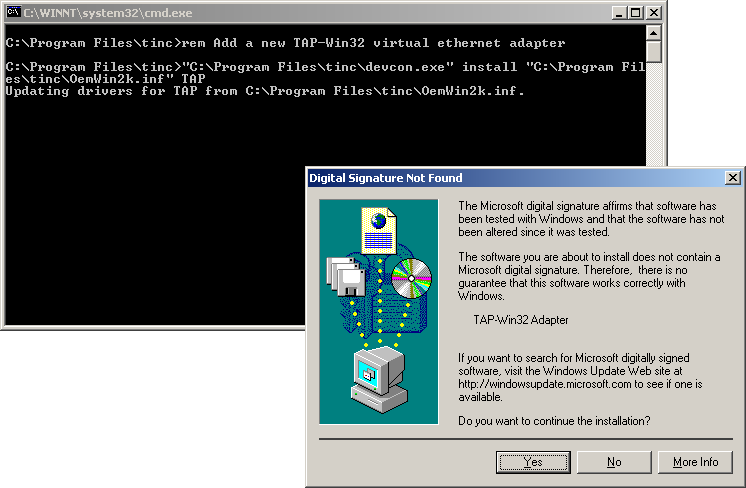
Configuring the virtual network device
Next you will have to set up the virtual network device. The
installer will not create those for you, you have to run
addtap.bat in tinc’s installation directory. This will
add a new virtual network device. (If you want to run more than one
tinc daemon, you will need to create extra virtual network
devices.)
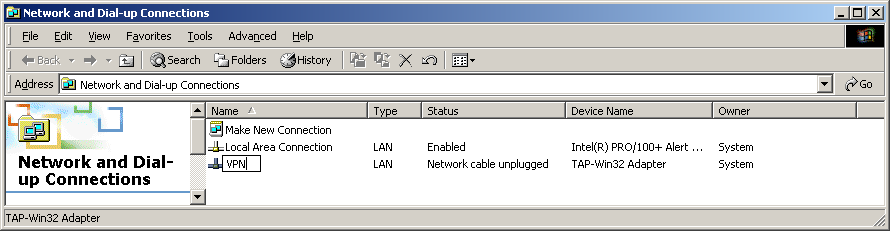
After that, open the Network and Dial-up connections control
panel, and change the name of the new interface to the same as you
specified in tinc.conf, in our case to
VPN.
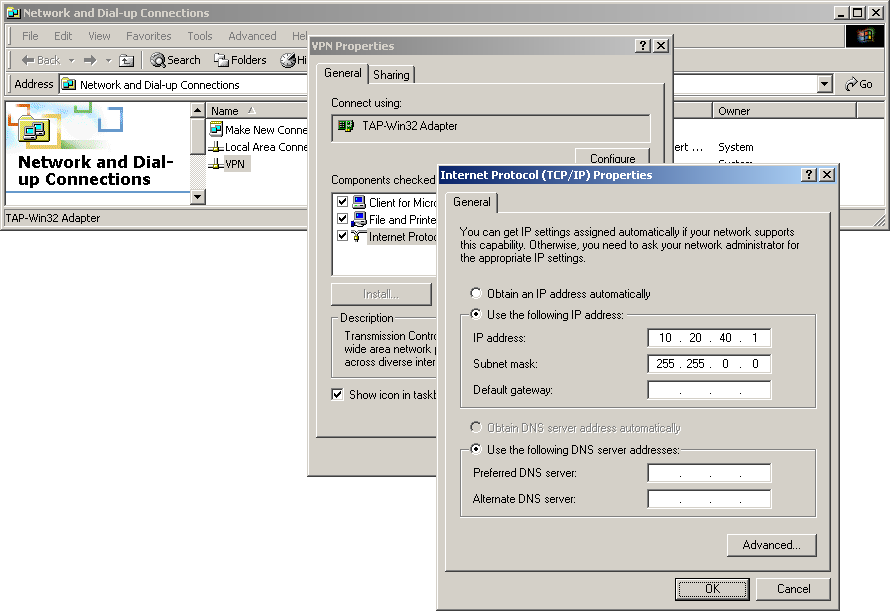
Then, double-click on the new interface. You can enable the icon in the taskbar if you want. Click on Internet Protocol and then on Configure. Manually set the address to that of your computer on the VPN, in this example 10.20.40.1. The subnet mask should be set to that of the entire VPN, in this example 255.255.0.0.
Starting tinc
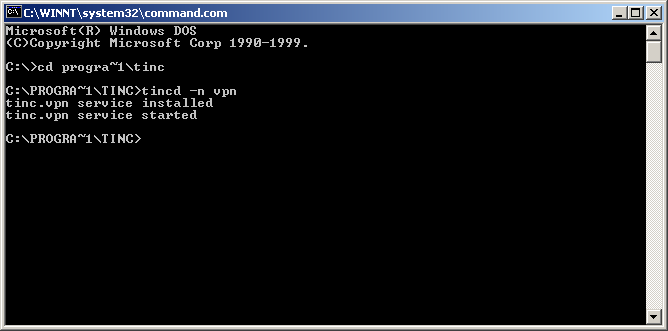
Now that everything has been set up, it is time to start tinc.
Start command.com, go to tinc’s installation directory and start
tinc with the right -n option: tincd -n
vpn. If everything went well, it will tell you that it
installed itself as a service and started it.
If you enabled the taskbar icon, you will notice that it changes form:

You can temporarily stop and start tinc from the Service control panel.
